Configure Virena
- The Virena service collects de-identified test results from Sofia 2 (also Sofia and Solana) instruments around the United States and makes them accessible at myvirena.com for analysis and reporting.
- After your Sofia 2 is Virena enabled, you may register at MyVirena.com to access your instruments’ and over 10 million de-identified test results from all Quidel instruments nationwide.
Configure Virena on your Sofia 2
Important
During configuration, please keep your Sofia 2 instrument plugged-in to a power source and powered-on at all times.-
Before configuring Virena, log in to the Supervisor Menu, select Settings, then select Other Settings.

Note
Virena functionality using a wireless cellular connection is currently only available within the U.S. Presently, outside of the U.S., Virena must be configured using an Ethernet connection.-
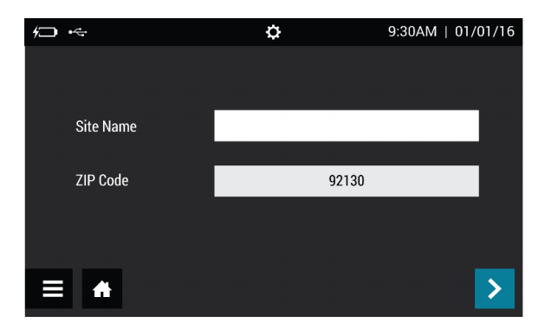
On the first screen, enter the name of the location under Site Name, enter the 5-digit ZIP Code where the instrument is located, select to confirm the entry and close the keyboard, then select the blue arrow key to advance to the next screen. Continue to set remaining settings as needed and return to the Run Test screen.
-
Returning to the Supervisor Menu, select Network Settings, then Virena Settings.

-
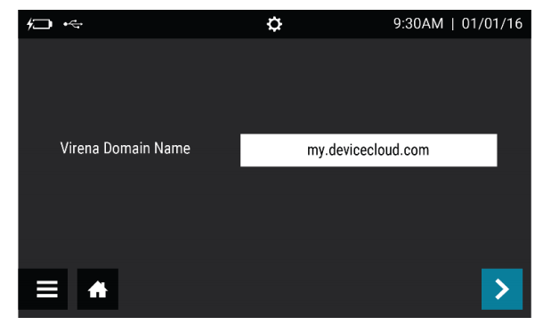
On the first screen, confirm that Virena Domain Name is pre-populated as my.devicecloud.com. If not, re-enter the information. Select the blue arrow key to advance to the next screen.
-
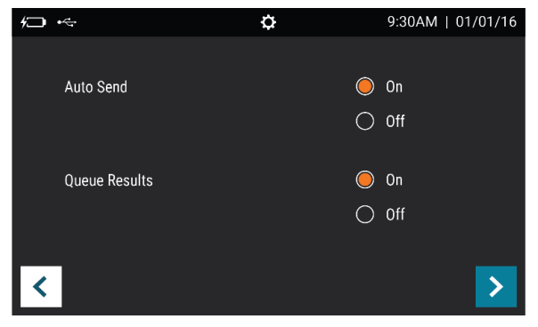
Set Auto Send and Queue Results to On. Select the blue arrow key to advance to the next screen.
-
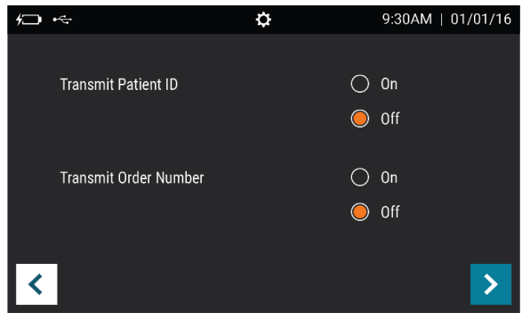
Confirm that Transmit Patient ID and Transmit Order Number are set to Off. Select blue arrow key to advance to the next screen.
-
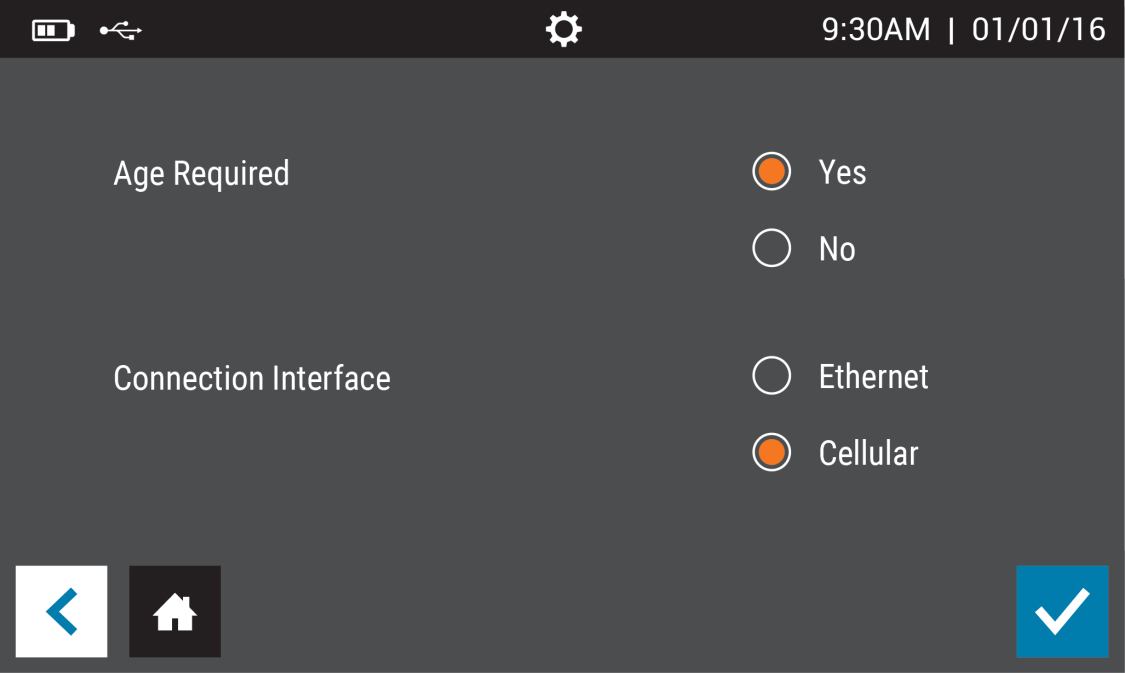
Confirm that Age Required is set to Yes or as desired by organization administrator. The screen will default to Cellular option. Ethernet is also an option however may require additional networking setup. Select blue arrow key to advance to the next screen.
-
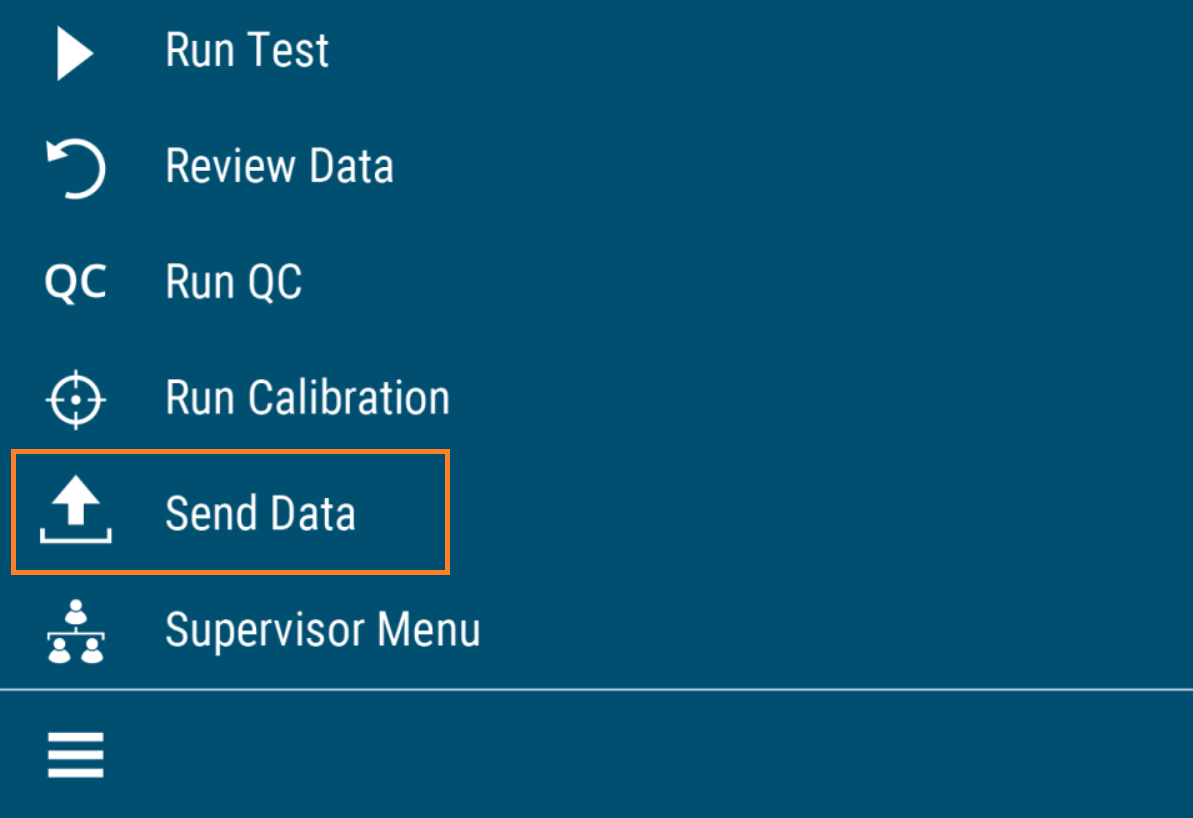
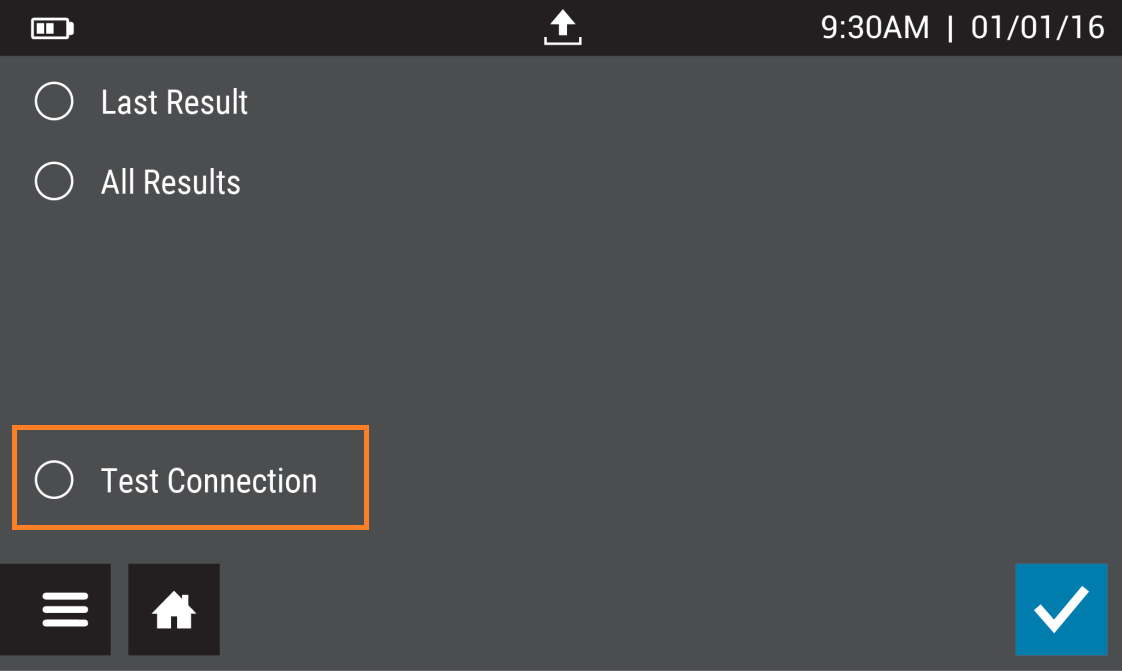
From the Main Menu, select Send Data, choose Test Connection, then tap the
 icon that looks like a cloud with an arrow going up through it.
-
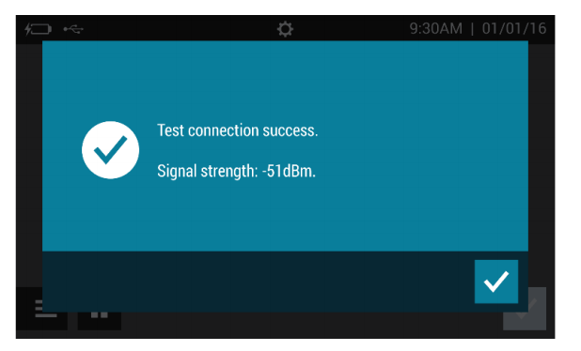
If the connection is successful, the message Test connection success. Signal strength -##dBm. will appear. Sofia 2 is now connected to the Virena cloud. If the connection is unsuccessful, contact Technical Support.
-
From the Main menu, tap Run Calibration, Patient Test, or QC to send a result to the Virena cloud and confirm the connection.
-
Optional: If you prefer to see results populate into the MyVirena.com app right away…
- Tap the bottom check mark to go back to the prior screen and then select “Send results/all results.”
- Tap on the bottom icon that looks like a cloud to send all results, allowing a few minutes for the results to be sent to the Virena cloud.
Note
Sofia 2 requires an “inactivity time-out” of at least 30 minutes before results will transmit to the Virena cloud. The expectation is that results will appear the next day. - Register at MyVirena.com to start using the app and see test results online.